- Obtain the latest version of Flatirons++ which includes Echos integration from the xtgeo downloads page. The file will be named something like “echos_rhel88_intelmpi_250818.tar.gz”. Do not select any file which starts with just “xtgeo” – they do not contain the required Echos code.
- Unzip the file somewhere on your Echos machine. The zip file should contain all required libraries.
- Open a terminal and cd into the EposApplications-V15.0/bin” directory
- Execute the command $./pgstart -cmd=”csh -f” -og
- Start the Flatirons++ application launcher. No license is required for this step. On our development computer the command is % /home/xtgeo/phoenix_package/Flatirons++_CPU_IntelMPI/Flatirons++.sh”.
- Select the “AspenTech” tab and click “Import Echos data…”.

7. This will open the Echos import application. This step will take quite a while. Note that this is a separate application, not just a dialog, so you may continue working with other applications while the window is open.
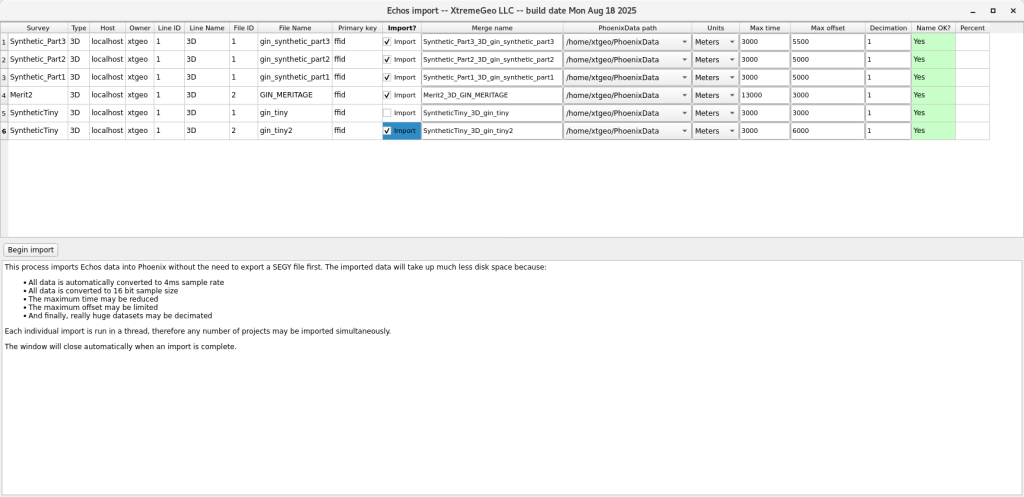
NOTE – only select shot ordered data!
- Select one or more datasets.
- If desired, change the default Merge name
- Be sure the correct PhoenixData path is selected
- Modify the Max time value. The data is automatically converted to 4ms
- Be sure to change the default maximum offset
- If desired, increase the decimation
8. Click “Begin import”. After a few seconds the display will change:
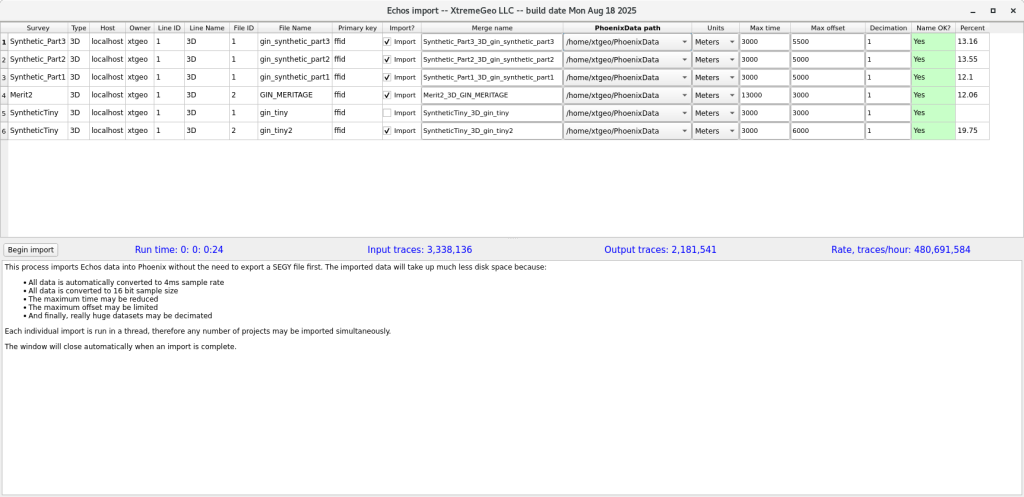
9. When the import has finished the Echos import window will close automatically. Go back to the Flatirons++ application launcher window and open Phoenix (license required).
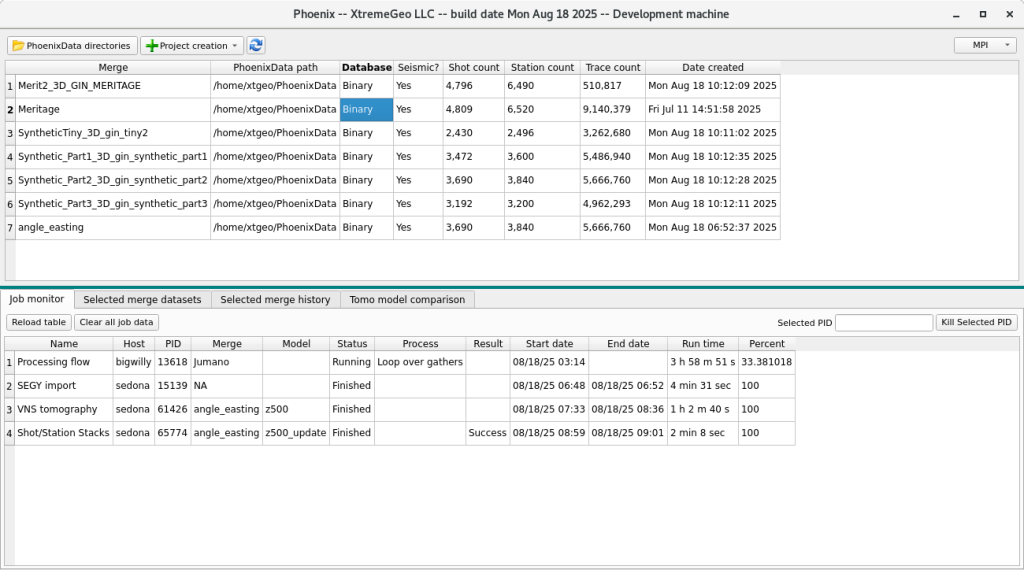
The newly imported Merges should be visible.
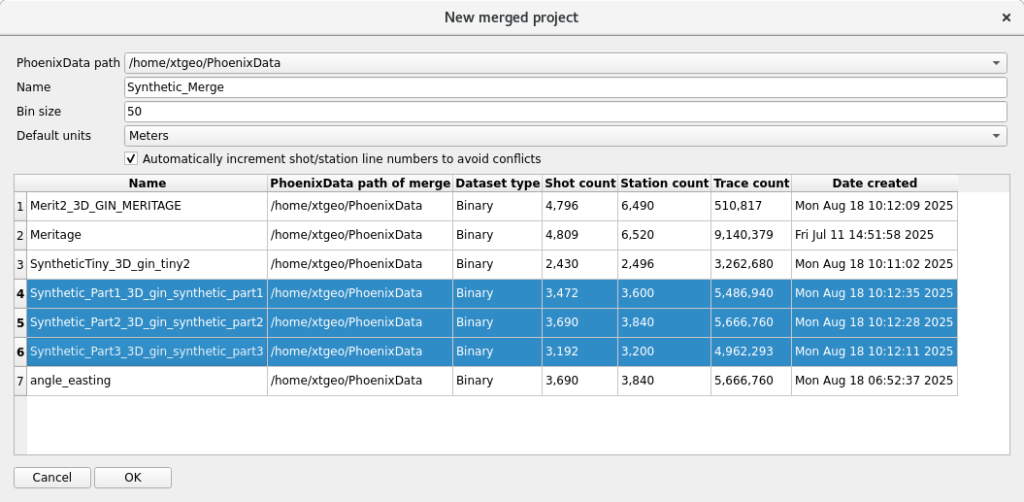
10. Create a merge (optional). From Phoenix select “Project creation” –> “Merge existing projects – any dataset format”. Select desired projects, give the merge a name, and click “OK”. The new merge will be created in just a few seconds: