A valid PickX license is required to perform this operation.
The Flatirons project must meet these two requirements:
- Shot ordered data
- A decent moveout trend must be defined
Launch the picker
Start the Flatirons++ application launcher and select “Run PickX on Flatirons project – license required”.

The following window will be opened in a separate executable:
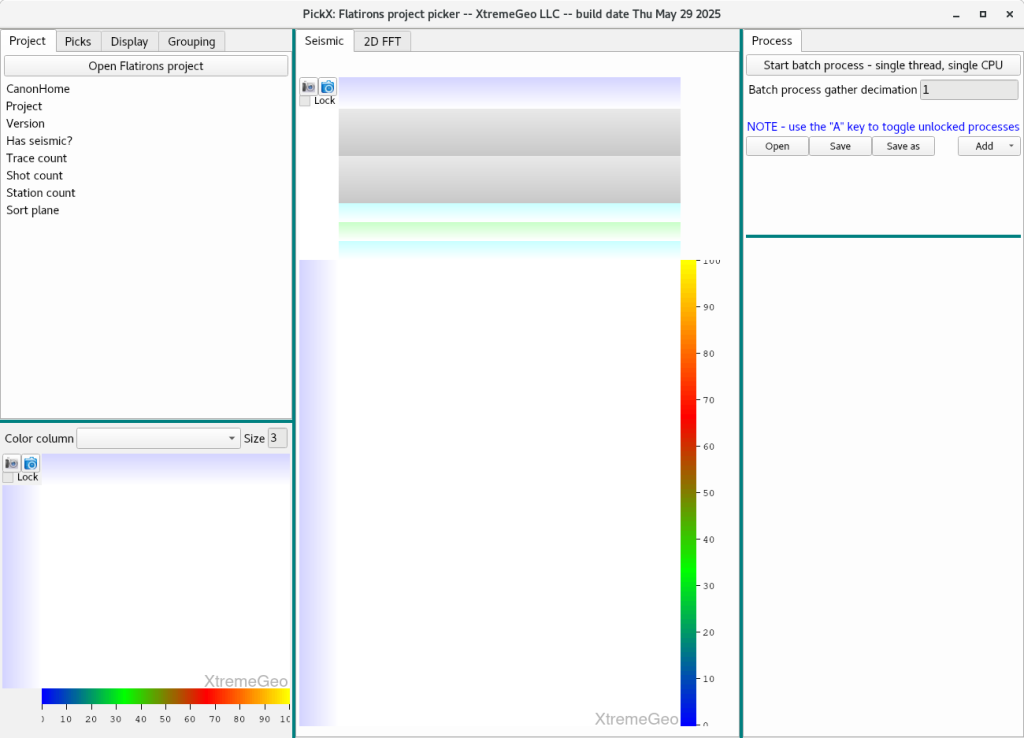
Click “Open Flatirons project” then select the CanonHome directory, the project and version.
NOTE – the CanonHome directory is the parent of the RefactionProjects directory!
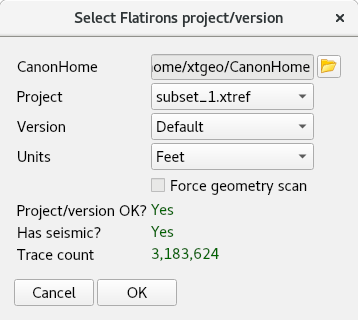
The program will scan the Flatirons project data to generate shot lookup information. This step may take a few minutes for large surveys, but will only be done the first time to project is opened.
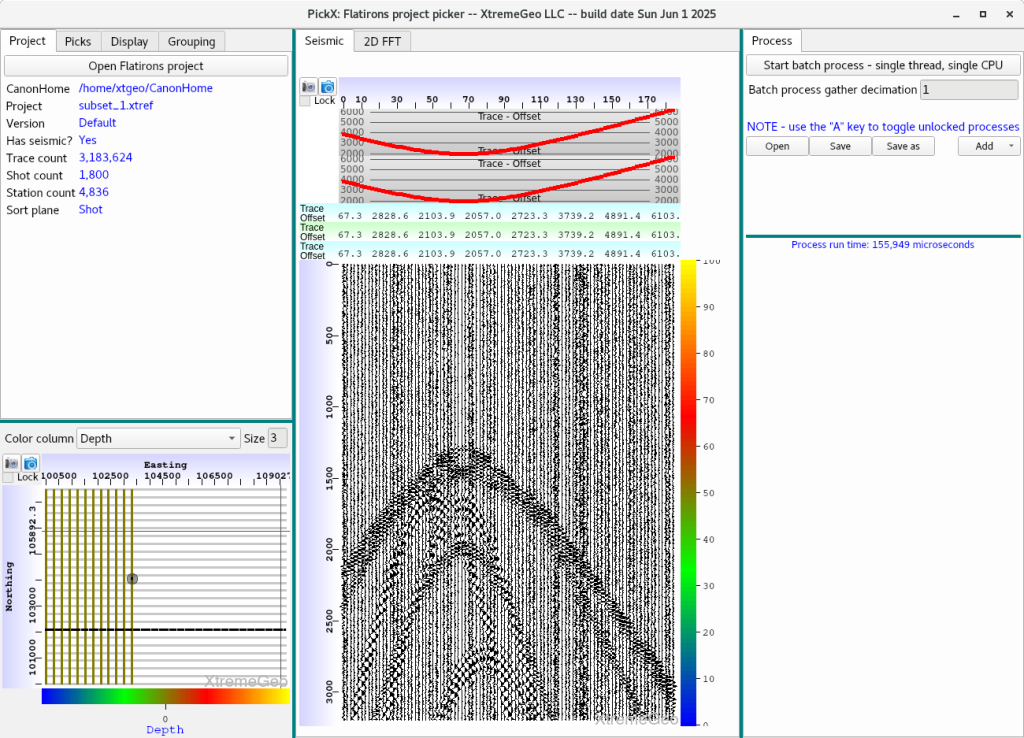
Once the scan is completed a shot will be selected and displayed.
Be sure “Grouping” is set to (Station,LineNumber) for 3D surveys.
Next add the “Moveout trend” and “PickX – segmentation picker” processes to the flow builder on the right.
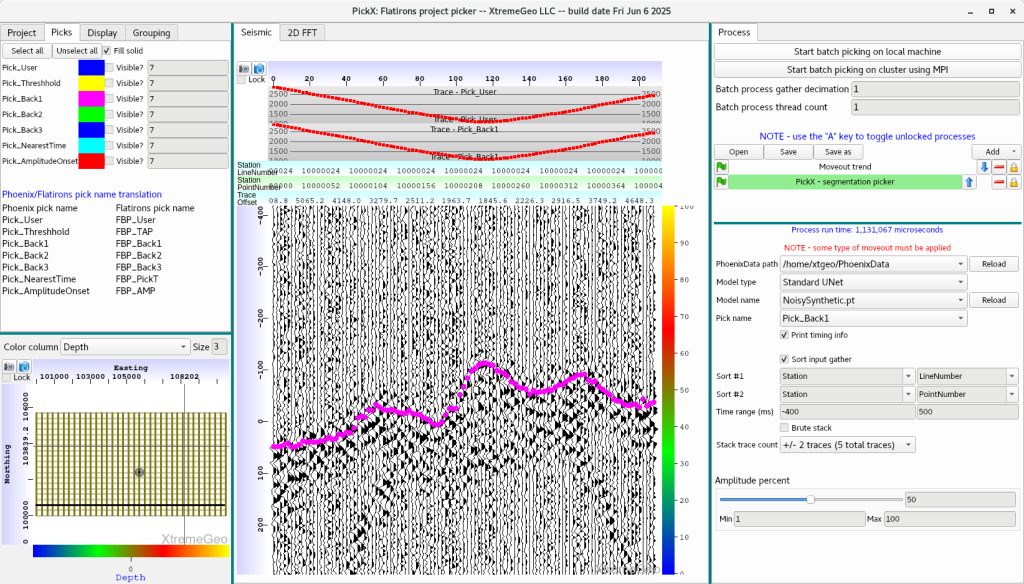
You will eventually have more than one trained model, so be sure to select the correct “Model name”.
The only other important option is “Pick name”. See the Flatirons/Phoenix name translator under the “Picks” tab in the upper left.
FInally start the batch picker. Running on the local machine can be quite slow if you’re running the CPU version of PickX, so MPI should be selected if a cluster is available.
Once the batch job has been started another Flatirons project may be selected and picked.